How to add texture to an STL file for 3D printing
A short, no-install guide. Add a seamless embossed or engraved pattern to any STL file directly in your browser, hide ugly FDM layer lines, and export a watertight STL ready for your slicer.
-
1
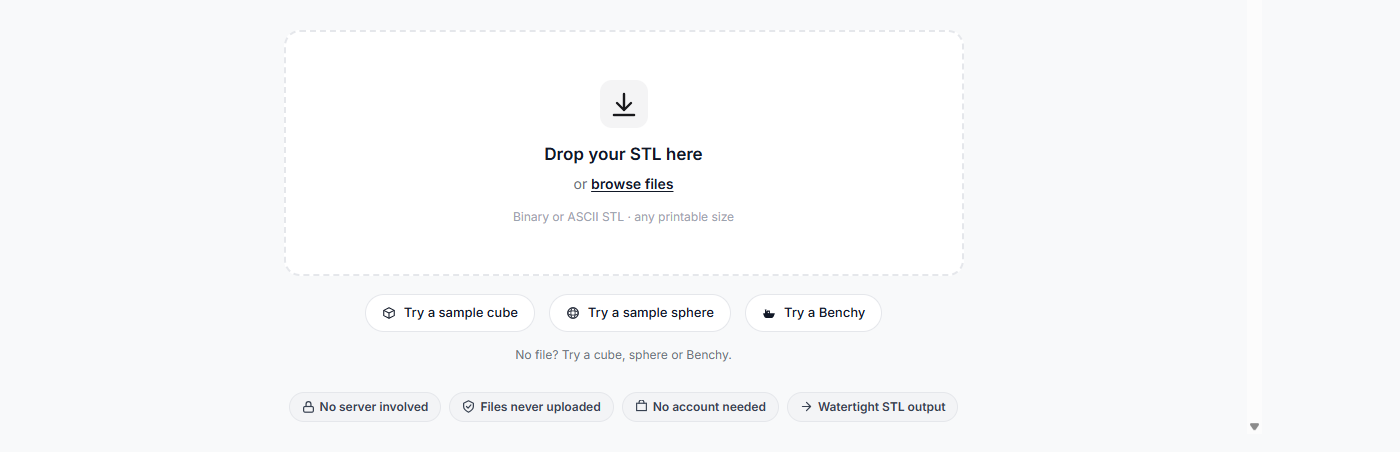
Open TextureAnySTL
Go to textureanystl.com in any modern browser (Chrome, Firefox, Safari, Edge). There's nothing to install or sign up for. The entire app is local JavaScript and WebGL.
-
2
Load your STL file
Drag and drop your STL onto the upload area, or click browse files. Both binary and ASCII STL formats are supported. No size limit beyond what your browser can handle.
Your file stays on your device. There is no server, no upload. You can verify this in DevTools → Network, or disconnect your internet after the page loads and everything still works.
-
3
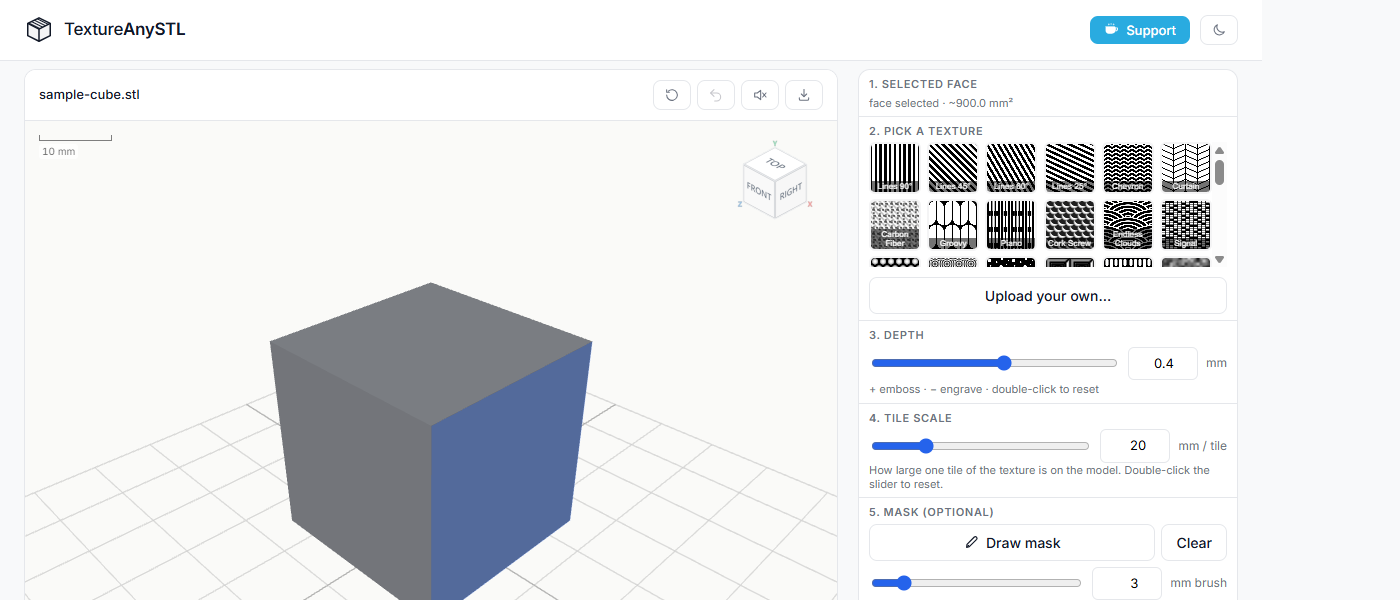
Click the face you want to texture
Rotate the model with left-drag, pan with right-drag, zoom with the scroll wheel. Then click any flat panel or curved surface. Coplanar triangles are automatically grouped into a single region.
Hold Ctrl (or Cmd on Mac) and click additional faces to select several at once and texture them in a single apply.
-
4
Pick a texture
Choose from 20+ seamless built-in patterns: geometric (hexagons, diamonds, boxes, Aztec), organic (bubbles, clouds, autumn leaves), or material-based (woven knit, aluminium tread plate).
Want something custom? Click Upload your own and pick any PNG, JPG, or SVG. The image is used as a greyscale heightmap: lighter pixels rise, darker pixels stay flat. Seamlessly tiling greyscale images work best.
-
5
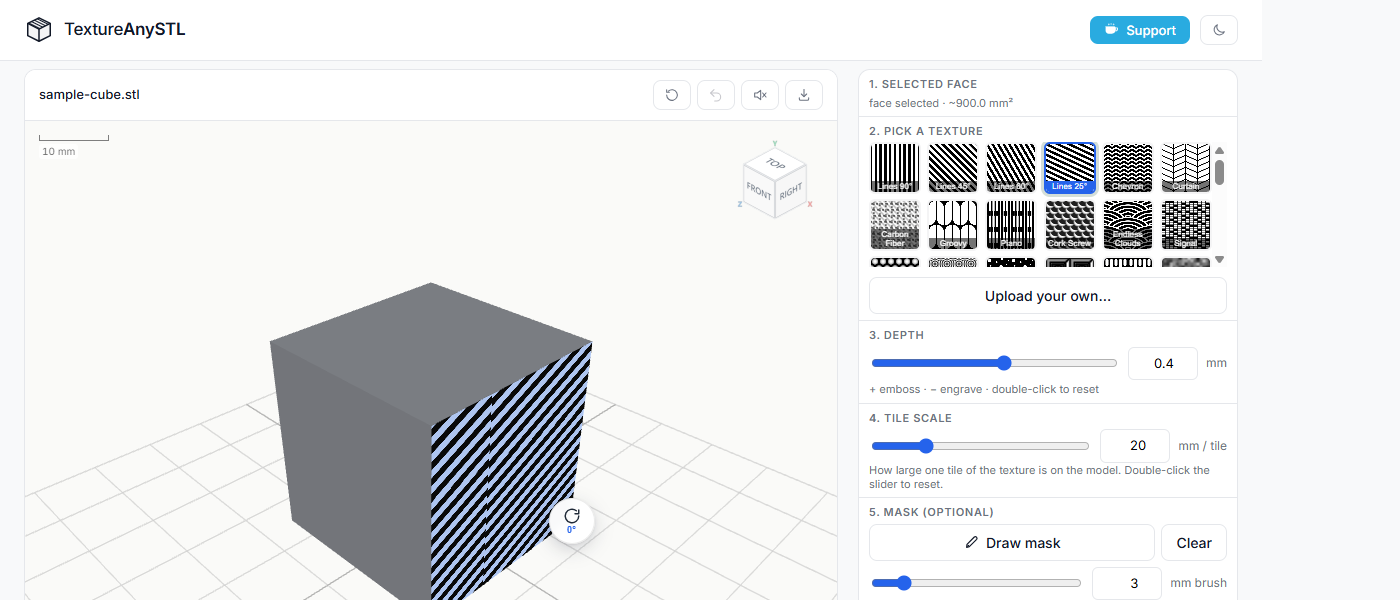
Set depth and tile scale
Depth controls how far the texture is pushed into or out of the surface, in millimetres. A positive value embosses (raises the pattern above the surface); a negative value engraves (cuts the pattern into the surface). Typical range: 0.2 – 0.6 mm for emboss, −0.2 to −0.5 mm for engrave.
Tile scale is how large one repeat of the pattern is on the printed model, in millimetres. Smaller = denser. Double-click any slider to reset it to its default value.
-
6
Rotate the texture (optional)
A small rotate pin appears on each selected flat face. Click it to rotate the texture preview by 90° steps. Each face has its own independent rotation, so you can orient patterns differently across the model.
-
7
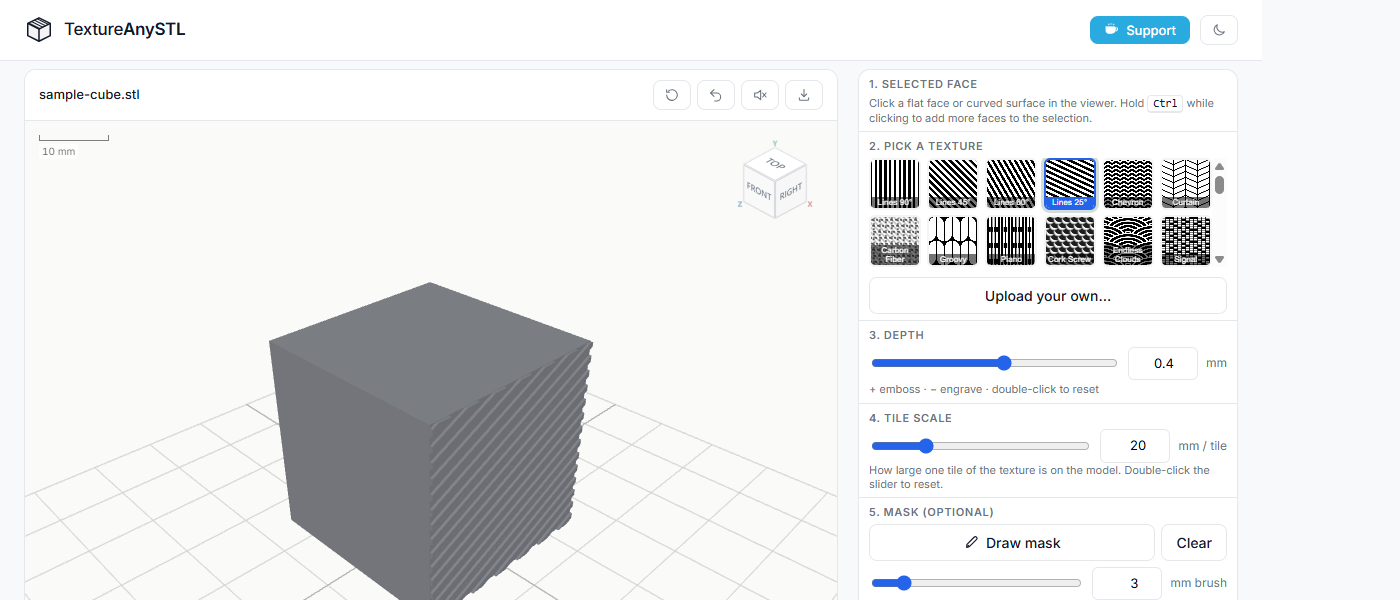
Apply and export
Click Apply to bake the texture permanently into the geometry. Use Ctrl+Z to undo if needed. When you're happy, click Export STL. You'll get a standard binary STL with a closed, watertight mesh.
The exported file works in Bambu Studio, PrusaSlicer, Cura, Chitubox, and any other slicer. Import it the same way you would any other STL. No special settings required.
Why add texture to a 3D print?
A flat surface printed on an FDM machine almost always shows visible layer lines. That's the horizontal banding left by each layer the printer extrudes. Even at 0.12 mm layer height, the eye still catches the stripes.
A shallow surface texture (0.2 – 0.4 mm depth) breaks up that banding visually so the model reads as a finished, intentional surface instead of a stack of layers. It works on PLA, PETG, ABS and resin, at any layer height, and removes the need for sanding, primer, or filler.
It also makes flat panels far more interesting on enclosures, plates, dice boxes, controller grips, planter pots, knife handles, and anything with a large unbroken surface.
Common questions
Does it work on curved surfaces? Yes. The texture wraps around fillets, spheres, and organic shapes with no visible seam.
Will my slicer accept the file? Yes. It's a standard binary STL with a watertight, manifold mesh. Tested in Bambu Studio, PrusaSlicer, Cura, and Chitubox.
Is anything uploaded? No. The page does all the work in your browser tab. No backend, no analytics on your file, no account.
For more, see the full FAQ on the homepage.